ANDROID 4 ICE CREAM SANDWICH INSTALLATION ON VMWARE WORKSTATION
You can download an iso version that supports sound and Ethernet here:
http://www.buildroid.org/Download/android-x86-vm-20120307.iso.gz
1. Create a new virtual machine to run the installation:
2. Point the “Installed disc image” to the android android-x86-vm-20120307.iso file you downloaded:
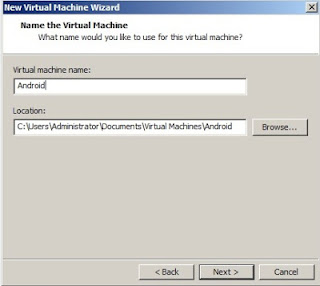
Choose an install directory, where you’ll keep the virtual machine folder and name it Android

3. Make a small drive. 5GB is enough. Press Next
4. Press Customize hardware before finishing.
8. Then: Create/Modify partitions <-- Press enter.
11. Choose [ Bootable ] <-- Press enter.
type yes <-- Press enter.
13. Now the disc is being prepared:
Choose [ Quit ] <-- Press enter.
15. Choose a file-system. I tried ext3. Take whatever you like.
19. You are done now select “Create a fake SD card”
20. Select size of SD card
You can download an iso version that supports sound and Ethernet here:
http://www.buildroid.org/Download/android-x86-vm-20120307.iso.gz
1. Create a new virtual machine to run the installation:
2. Point the “Installed disc image” to the android android-x86-vm-20120307.iso file you downloaded:
Choose an install directory, where you’ll keep the virtual machine folder and name it Android

3. Make a small drive. 5GB is enough. Press Next
4. Press Customize hardware before finishing.
5. Increase the RAM to 512 megabyte or more.
Remove Floppy Drive
Remove Floppy Drive
Check NAT Ethernet Card is added. If not then add it
After completing press close
6. Then press finish.
7. Select INSTALL. You can also run the live CD. But I prefer to install the OS.
If you choose live cd, you don’t need to do anything after this step, except
enjoy your android.
8. Then: Create/Modify partitions <-- Press enter.
9. Choose [ New ] <-- Press enter.
10. Then [ Primary ] <-- Press enter.
Size (in MB): 5362.89 <-- Press
enter.
11. Choose [ Bootable ] <-- Press enter.
12. Then Choose [ Write ] <-- Press enter.
type yes <-- Press enter.
13. Now the disc is being prepared:
Choose [ Quit ] <-- Press enter.
14. Now select
sda as the install partition:
15. Choose a file-system. I tried ext3. Take whatever you like.
16. Now select yes to write all data to hard drive.
17. Install the GRUB boot loader.
18. File-system writable? If you want a writable file-system, choose yes.
19. You are done now select “Create a fake SD card”
20. Select size of SD card
21. Now select Reboot
19. If you don’t want to create SD card then Choose Run
Android-x86 on step 19.
20. Android 4 Ice cream sandwich interface loaded.


