Saturday, 18 March 2017

XUbuntu 16.04 Screen Brightness Controls

XUbuntu 16.04 Screen Brightness Controls Not Working

Open the grub file using following command in terminal

sudo nano /etc/default/grub
add acpi_osi=Linux at the end of the following line as below

GRUB_CMDLINE_LINUX_DEFAULT="quiet splash" 
TO
GRUB_CMDLINE_LINUX_DEFAULT="quiet splash acpi_osi=Linux"

Save the file /etc/default/grub by pressing "Ctrl o"

Exit the file /etc/default/grub by pressing "Ctrl x"

Update the grub using following command
sudo update-grub 
 
Run the following command to check the graphics card
ls /sys/class/backlight/

it will list something like following
acpi_video0  acpi_video1  intel_backlight  nv_backlight  

if intel_backlight listed, then it is intel graphic card. while nv_backlight is for nvidia

Now create following file by running the mentioned command
sudo nano /usr/share/X11/xorg.conf.d/20-intel.conf

Add following lines as it is

Section "Device"
        Identifier  "card0"
        Driver      "intel"
        Option      "Backlight"  "intel_backlight"
        BusID       "PCI:0:2:0"
EndSection
 
Save the file by pressing "Ctrl O"
 
Exit the file by pressing "Ctrl X"
 
Now reboot the machine by running following command 

reboot

It worked for me...hopefully it will do the task for you as well. 
 

Monday, 24 October 2016

Cyber Security Management

1. Manage the IT assets
·         Identify the assets in an environment and its life
·         disable/restrict the vendor defaults
·         define the patch cycle for firmware
·         review the assets list regularly
2. Manage the software’s in an environment
·         define a list of authorized software
·         assess the environment for un-authorized software’s and remove it
·         define the patch cycle for authorized software
·         review the authorized software list regularly
3. Secure the access to an environment
·         identify the access points to an environment
·         restrict the access points with appropriate controls (physical, logical)
·         review the access point controls regularly
4. Secure the endpoint
·         document the endpoint configurations
·         restrict the admin privileges at endpoint
·         update/upgrade the endpoint regularly
·         review the endpoint configurations regularly
5. Identify and address critical vulnerabilities
·         assess the environment for vulnerabilities regularly
·         patch the vulnerabilities as per patch cycle
6. Control the use of administrative privileges
·         identify & document the admin access rights
·         limit the admin access rights to the job tasks
·         log the admin activities in detail
·         review the admin activities regularly
7. Conduct the awareness trainings
·         define the relevant awareness material
·         provide the awareness trainings regularly
·         assess the users for awareness

Wednesday, 20 July 2016

HOW TO GENERATE AND VERIFY MD5 HASH IN WINDOWS & LINUX

HOW TO CHECK THE INTEGRITY OF THE DOWNLOADED IMAGE IN WINDOWS & LINUX

LINUX:
GENERATE THE MD5 HASH BY USING FOLLOWING COMMAND
MD5SUM FILE.ISO > HASH.MD5

CHECK THE MD5 HASH WITH FOLLOWING COMMAND (PLACE VENDOR PROVIDED HASH TO THE SAME LOCATION)
MD5SUM -C HASH.MD5

OR

OPEN BOTH VENDOR PROVIDE AND SELF GENERATED FILES AND MACH THE STRING. IF BOTH THE STRINGS ARE SAME THEN FILE INTEGRITY IS INTACT.

WINDOWS:
DOWNLOAD THE FILE CHECKSUM INTEGRITY VERIFIER (FCIV) UTILITY FROM FOLLOWING LINK
https://support.microsoft.com/en-us/kb/841290

EXTRACT THE UTILITY, OPEN CMD/COMMAND PROMPT AND MOVE TO THE EXTRACTED UTILITY PATH.

RUN FOLLLOWING COMMAND TO COMPUTE THE HASH VALUE OF THE DOWNLOADED IMAGE/FILE.
FCIV -md5 path\filename.iso

OPEN THE VENDOR PROVIDED HASH FILE AND ABOVE COMPUTED HASH FILE AND MATCH THE STRING.

IF STRING MATCHES THEN INTEGRITY IS INTACT.

Wednesday, 11 May 2016

WINCOLLECT ERROR THE EVENT LOG FILE IS CORRUPTED

WINCOLLECT ERROR

THE EVENT LOG FILE IS CORRUPTED

<13>May 11 13:04:29 10.10.1.13 LEEF:1.0|IBM|WinCollect|7.2|4|src=10.10.XX.XX     dst=10.10.XX.XX        sev=5   log=Device.WindowsLog.WindowsLogDeviceReaderPool.PoolThread   msg=WindowsLogDeviceReaderPool::svc - ALE exception in device 0xCCE4C8ED (OS @ 10.10.XX.XX - ReadEventLog failed - perhaps the event log was either closed or we are shutting down. The event log will be closed and will be re-opened (if appropriate).). Last error: Error code 0x05DC: The event log file is corrupted.

#STOP WINCOLLECT SERVICE AT SOURCE MACHINE
GOTO SERVICES --> LOCATE WINCOLLECT --> STOP IT

#COPY ALL EVENT FILES
GOTO --> %SystemRoot%\System32\Config\xxx.evt --> copy all related .evt files to any backup location.

#CLEAR EVENT FROM EVENT VIEWER
GOTO --> EVENT VIEWER --> WINDOWS LOG --> APLICATION/SYSTEM/SECURITY --> CLEAR LOGS

#START WINCOLLECT SERVICE
GOTO SERVICES --> LOCATE WINCOLLECT --> START IT

IT WILL CLEAR THESE ERRORS....!

Tuesday, 1 March 2016

XTREME DOWNLOAD MANAGER INSTALLATION IN UBUNTU

XTREME DOWNLOAD MANAGER INSTALLATION IN UBUNTU

sudo add-apt-repository ppa:noobslab/apps        
sudo apt-get update        
sudo apt-get install xdman

HOW TO INSTALL XDM PLUGIN INTO MOZILLA FIREFOX

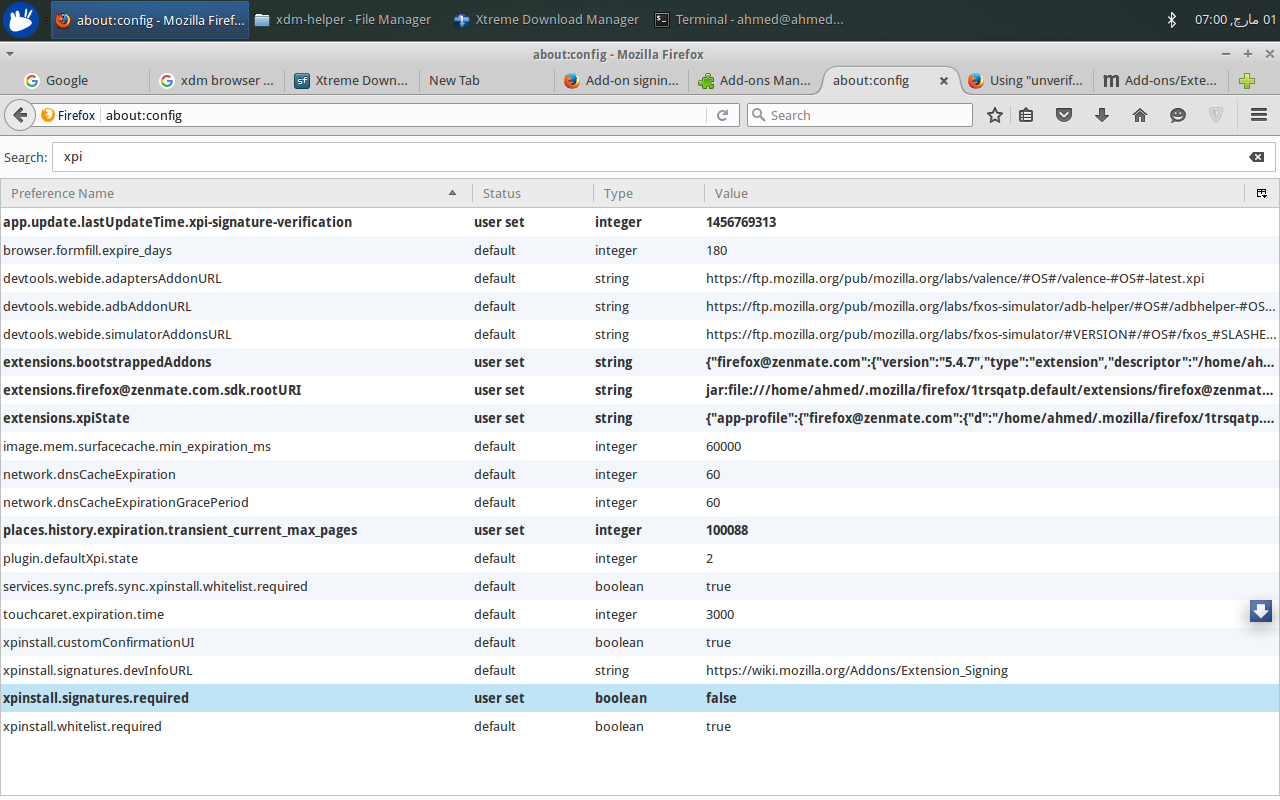
1. Open Mozilla Firefox and type "about:config" in address bar.
Search "xpi" and and double click "xpinstall.signatures.required" to switch it from true to false.
123.png

2. Locate "xdmff.xpi" which is usually placed in /home/user/xdm-helper/ and drag xdmff.xpi into Mozilla-Firefox
12.png

3. It will show the install option. click "Install"
1234.png

XDMAN INSTALLATION IN UBUNTU
XDMAN PLUGIN INSTALLATION IN MOZILLA FIREFOX
XTREME DOWNLOAD MANAGER INSTALLATION IN UBUNTU
XTREME DOWNLOAD MANAGER PLUGIN INSTALLATION IN UBUNTU

Monday, 29 February 2016

HOW TO CREATE IBM QRADAR SIEM RULE AND RULE GROUP

How to create siem rule group

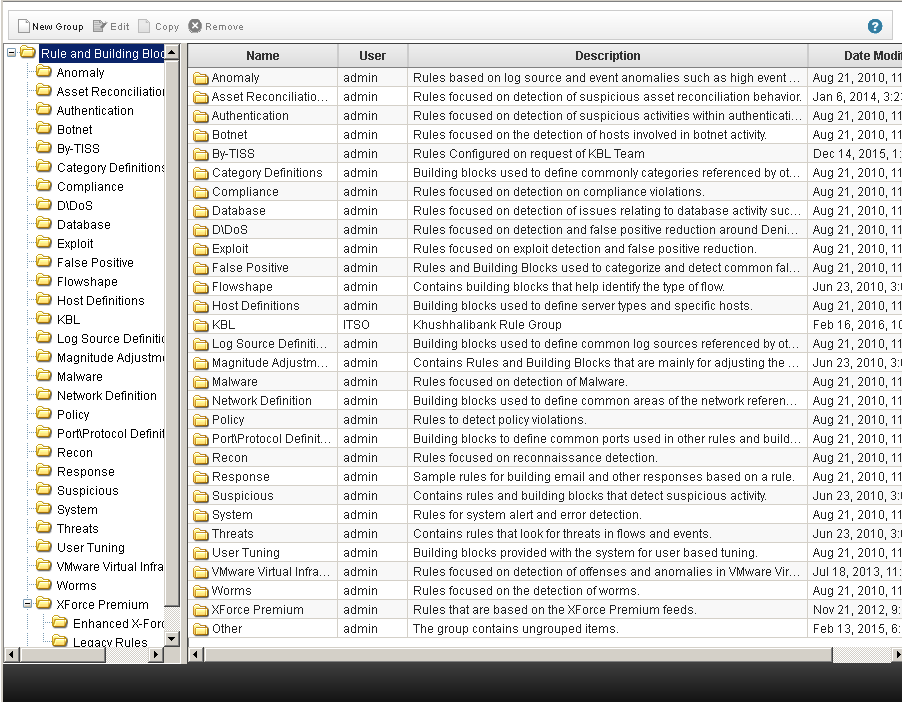
1. Goto to Offenses tab --> Rules in left pane --> Groups at top in right pane

2. It will open following wizard. click New Group at top


3. Add group name and description and click OK


How to create siem rule

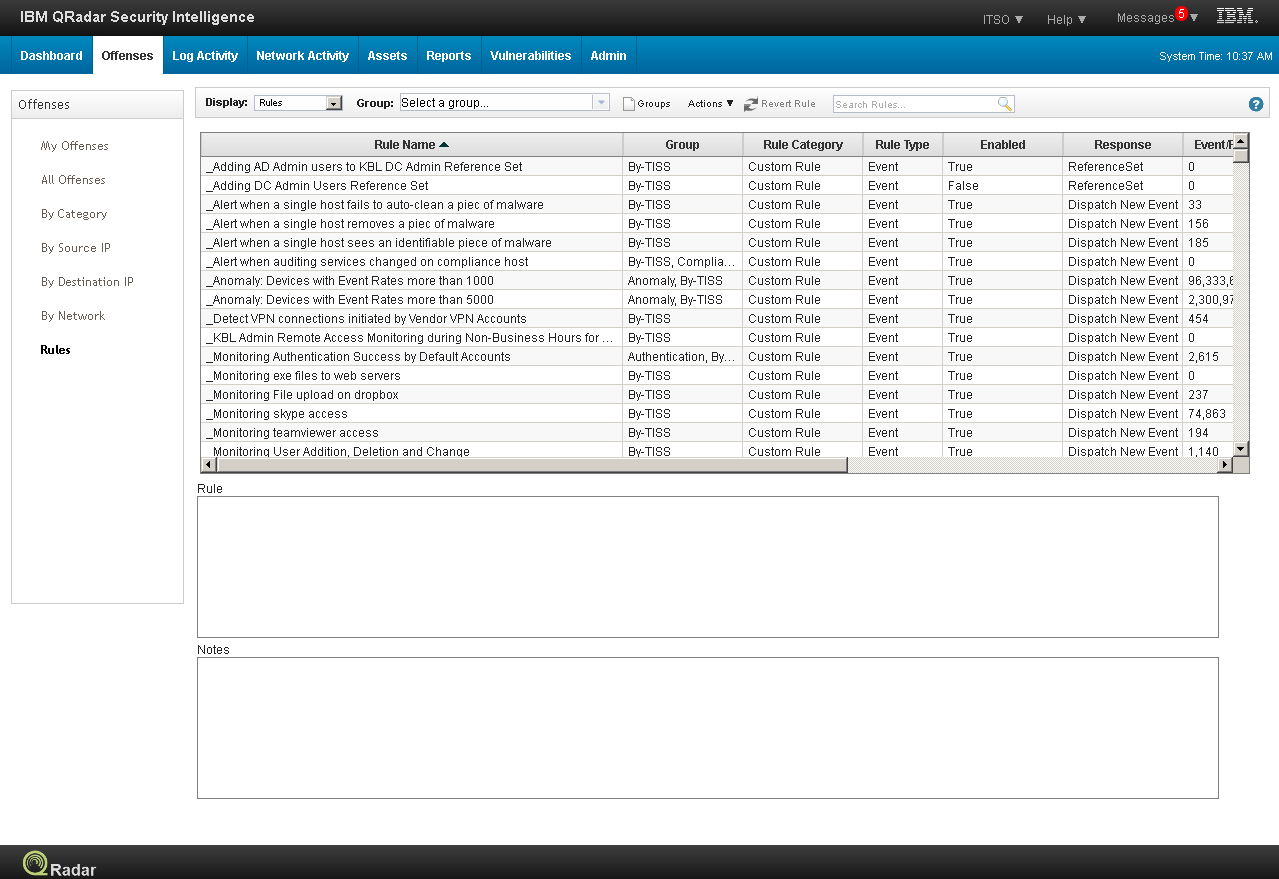
SIEM Rule to identify log sources not sending event for specific time.

1. Open Offenses tab --> Rules in left pane --> Display --> rule


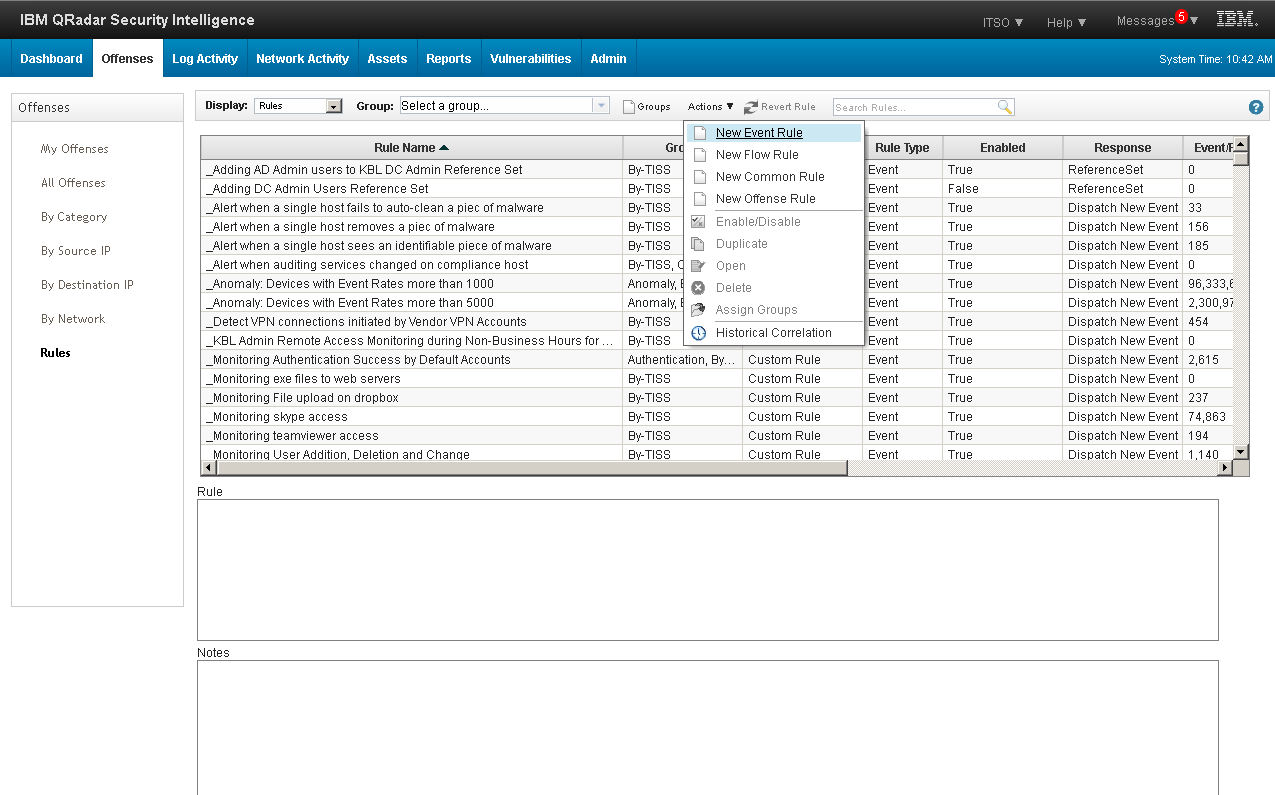
2. Click "Actions --> New Event Rule or whatever you want to create


3. It will open a wizard click Next


4. Click Events, Flows, Events and Flows, Offenses as you want to create. I selected Events and click next.


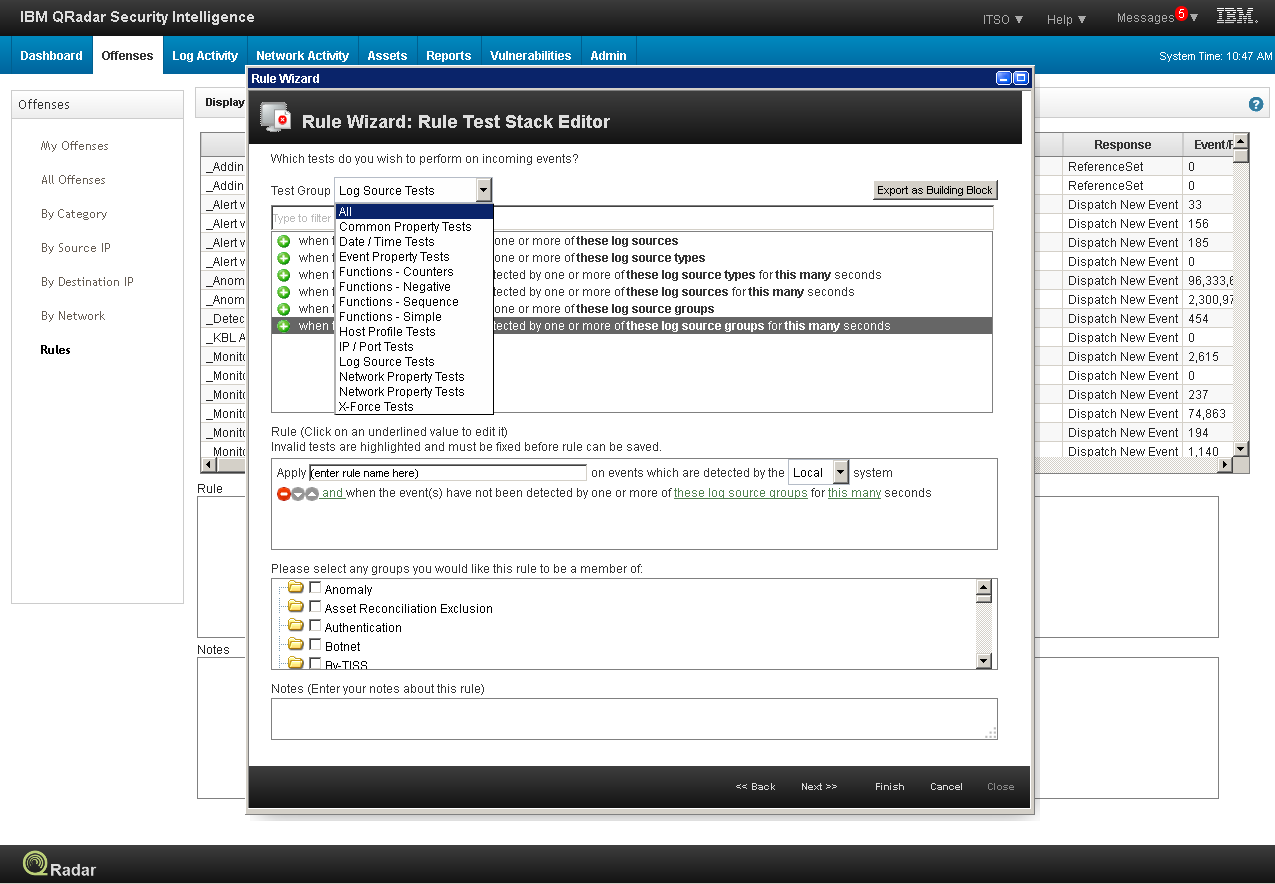
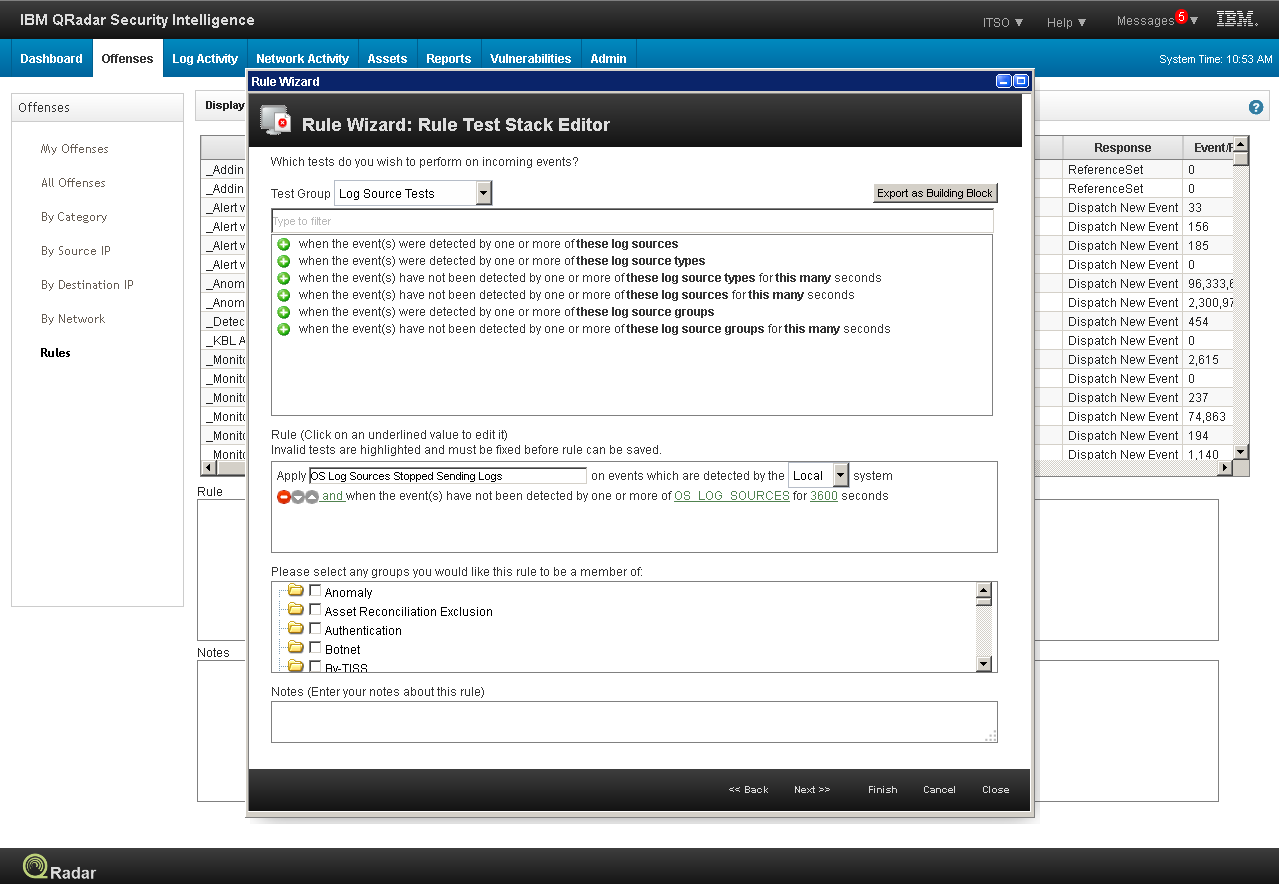
5. Select Test Group which is suitable to your requirements. I have selected Log Source Tests and added last option by clicking on + sign at left.


6. Add log sources which you want to test and put time in seconds to test. Select group in which you want to place this rule and click next.


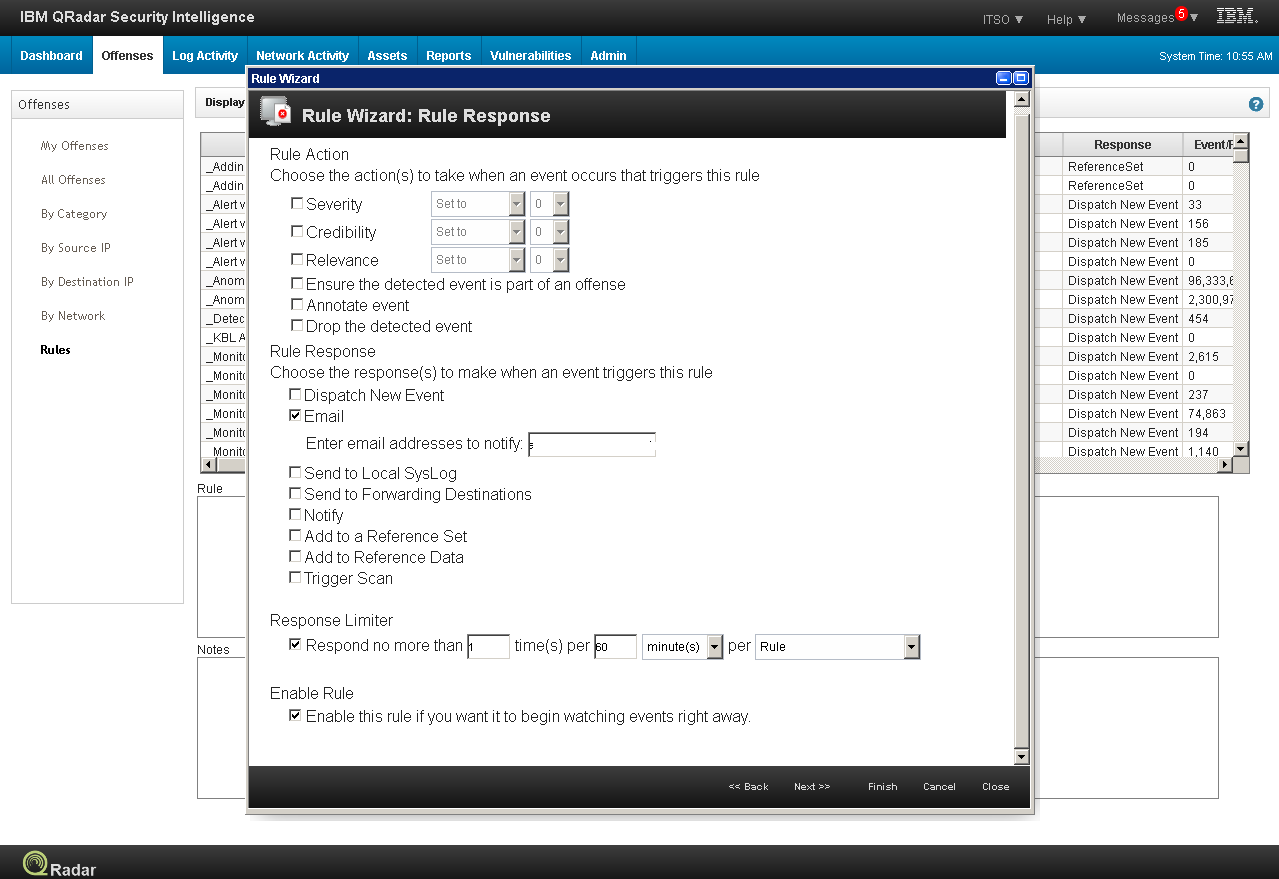
7. Select the action to be performed on this rule. I have selected Email to send and email for this rule.

rule.jpg

8. Click the Finish to complete the rule.


It will create a rule to check the selected log sources not sending event for the specified amount of time.

SIEM use case for log sources not sending events for specific time.

IBM QRADAR WINCOLLECT AGENT INSTALLATION AND CONFIGURATION

IBM QRADAR WINCOLLECT AGENT INSTALLATION AND CONFIGURATION


Download wincollect agent and wincollect management console 

Managed Mode
1. Only wincollect will be installed at client end
2. SIEM Server will manage wincollect agent configuration and updates

Un-Manged Mode
1. Wincollect & Management console will be installed at client end 
2. Agent will be stand alone and all configurations will be at client end. wincollect updates will also be independent from server

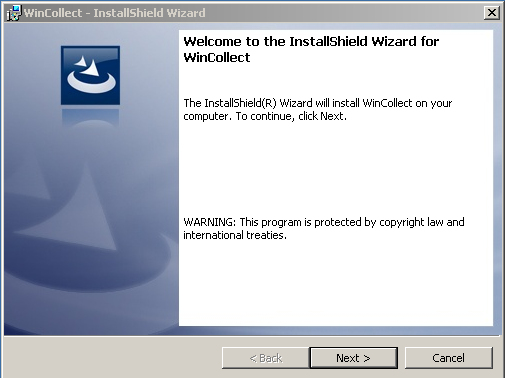
How to install WinCollect agent in Managed and Un-Managed (Standalone) mode

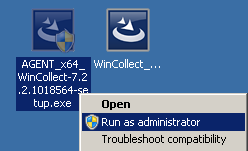
2. Right click on the wincollect-7.2.2-.exe and "run as administrator"


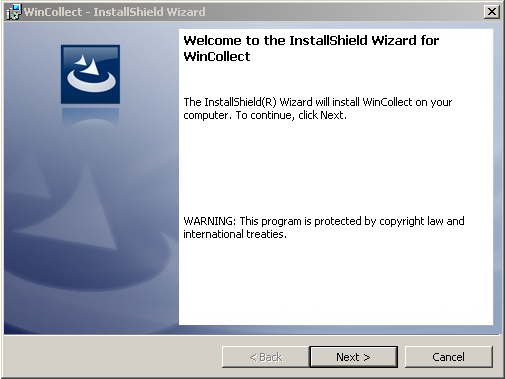
3. Click next


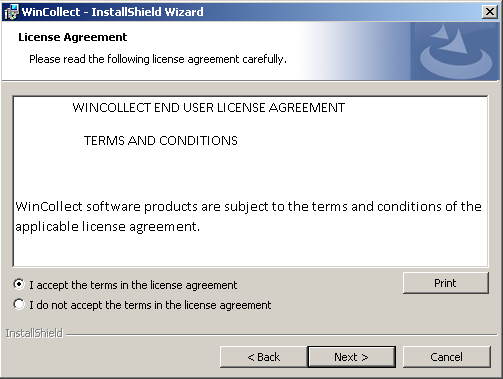
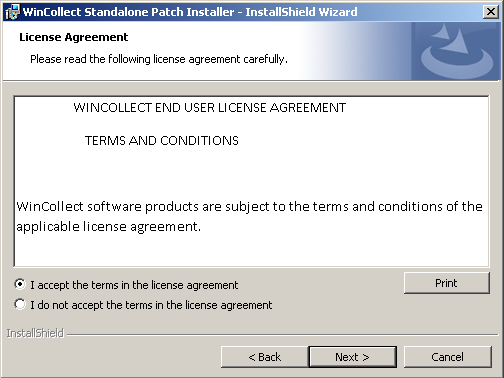
4. Click "I accept the terms in the license agreement" and click next


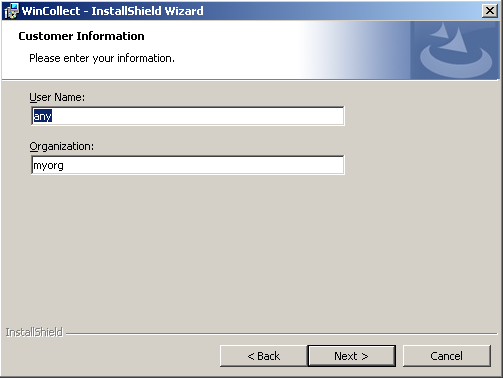
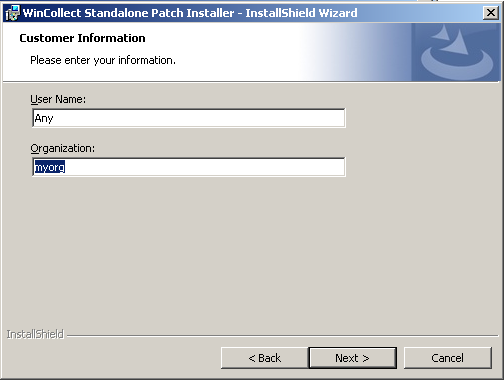
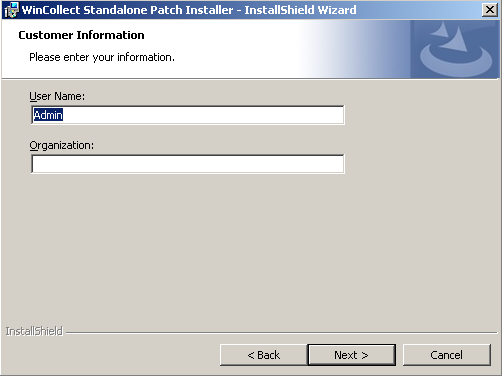
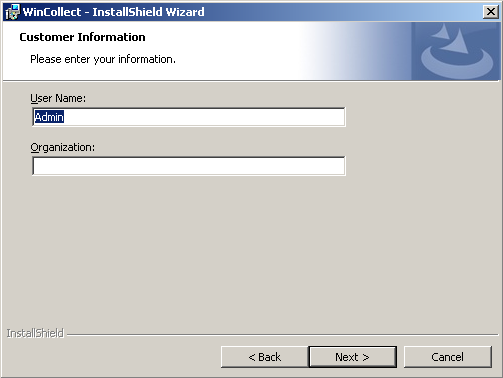
5. Leave the "User Name:" and "Organization:" field default and click next


6. Select the path to install wincollect. The selected installation path should have enough space for wincollect log caching.


7. In un-managed mode leave all fields blank and click next.
In SIEM Server managed mode put following fields.
Host Identifier: IP or Hostname as you wish.
Authentication Token: Token should be taken from SIEM Server Admin tab --> User management --> Authorized services
Configuration Console: Siem server ip and port (8413)
Syslog Status Server: leave it blank if your siem is all in one, otherwise put your syslog server's IP
Click Next


8. In un-managed mode leave all fields blank and click next.
In managed mode put following fields
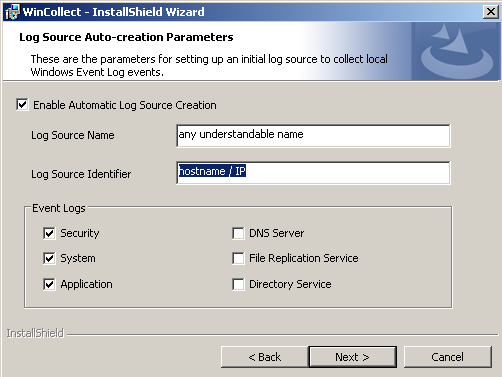
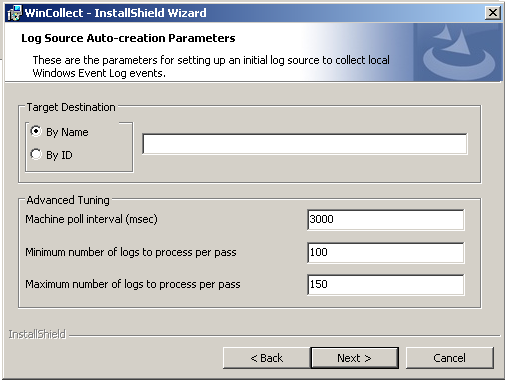
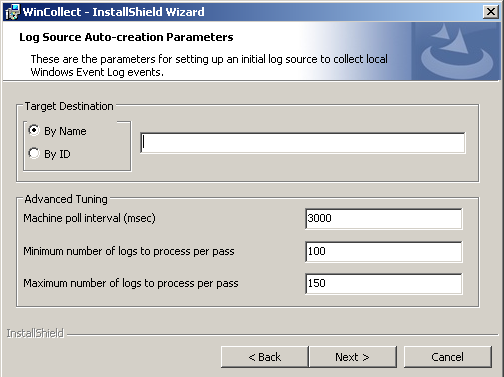
If you want to create a log source automatically in SIEM Server then select "Enable Automatic Log Source Creation" and put following details.
Log Source Name: Any descriptive name 
Log Source Identifier: IP/hostname you already put in last step "Host Identifier" field
Select Event logs which you want to collect and click next.


9. In un-managed mode leave all fields blank and click next.
In Managed Mode leave it blank and click next


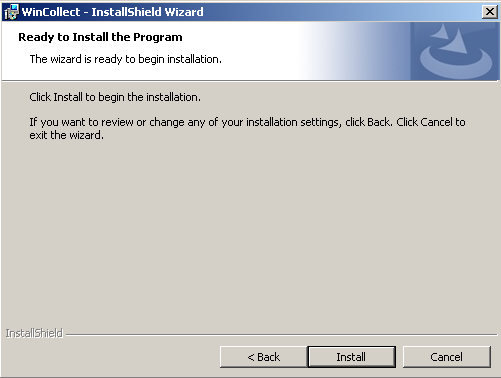
10. Click install


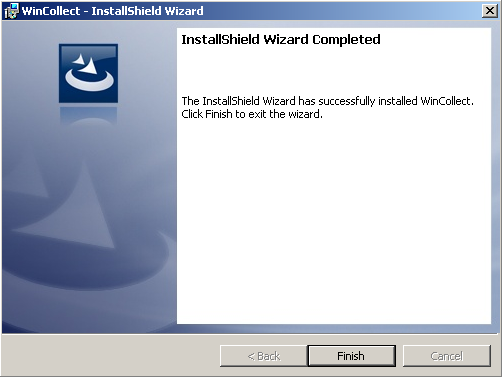
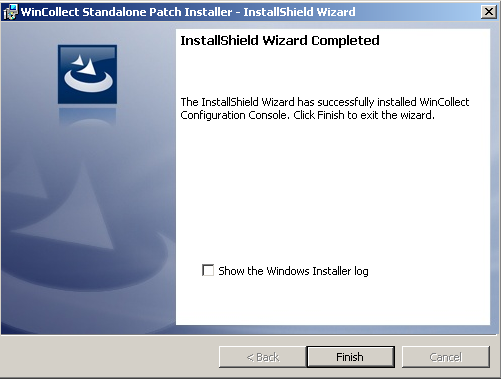
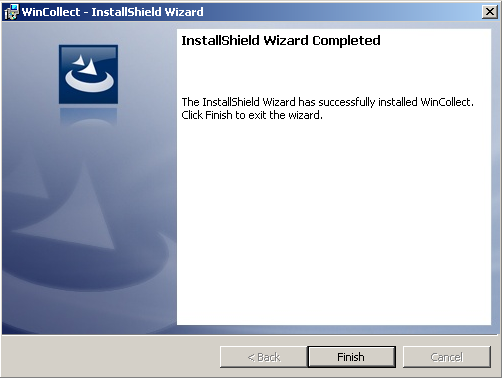
11. Click finish


Install Management Console for Un-Managed wincollect agent.

1. Right click the stand alone 


2. Click


3. Click


4. Click


5. Click


6. Click


7. Click


8. Click


How to Configure stand alone wincollect at client end.

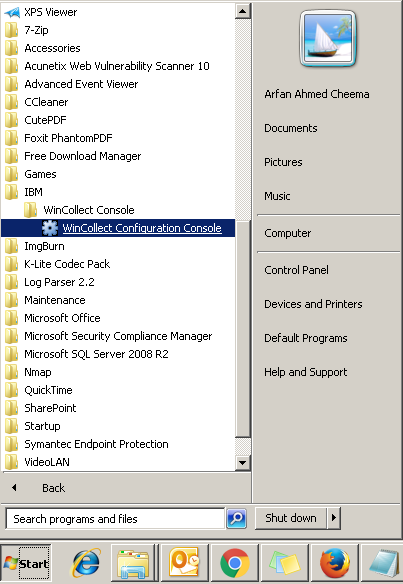
1. Goto Start and open "WinCollect Configuration Console"


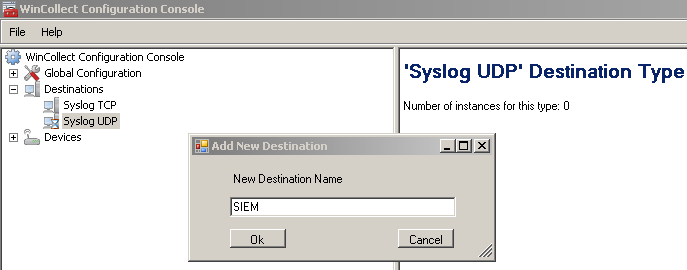
2. Expand "Destinations" and right click "Syslog UDP" then "Add New Destination"


3. Put Destination name "SIEM" and press "OK"


4. Add IP of the SIEM Server in Hostname field and click "Deploy" at right pane.


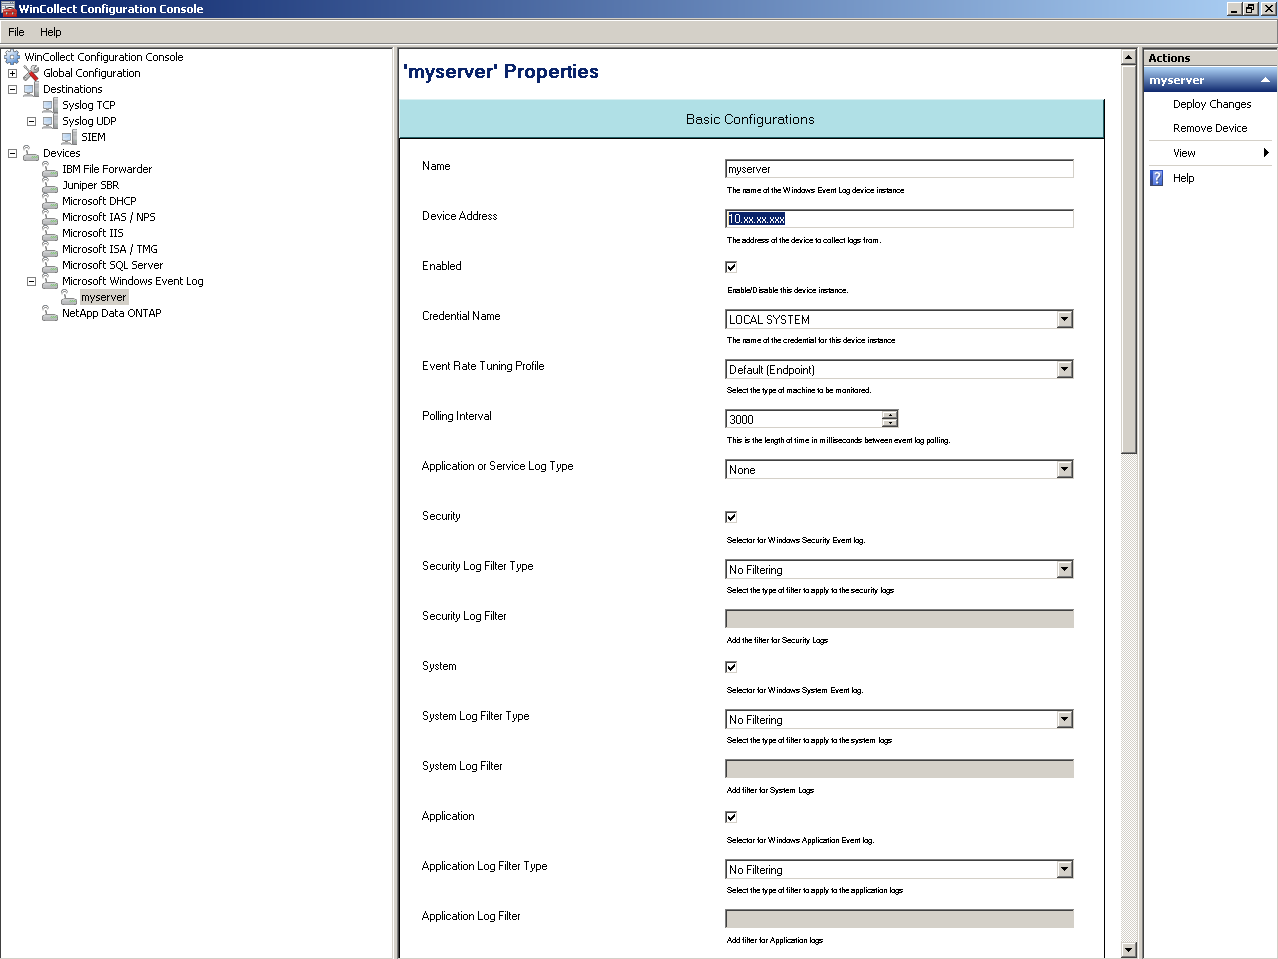
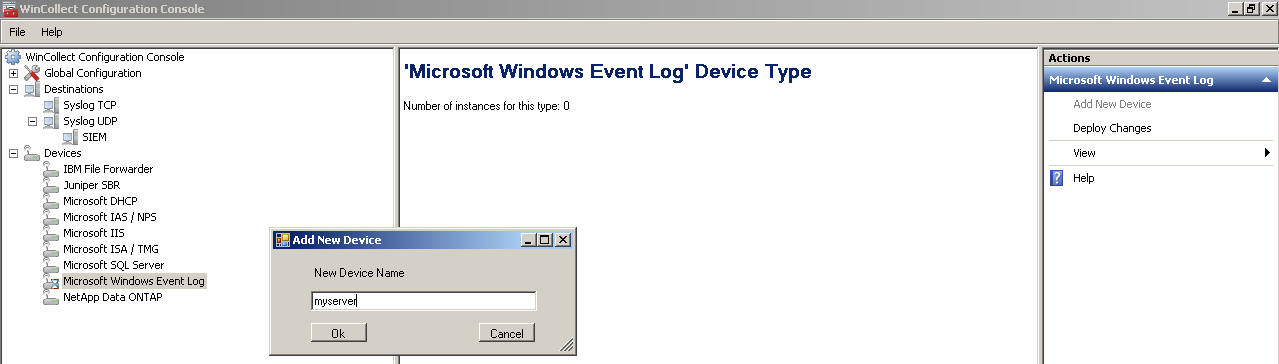
5. Expand devices section and right click "Microsoft Windows Event Logs" then "Add New Device" 


6. Put the name of the log source and press ok


7. Put "Device Address" as IP and select "Security", "System", "Application" options for logs
Add destination by clicking on "Add", which we have created in first section named "SIEM" and "Deploy Changes" in right pane


It will start sending logs to the SIEM Destination.

File Forwarder Stand alone mode

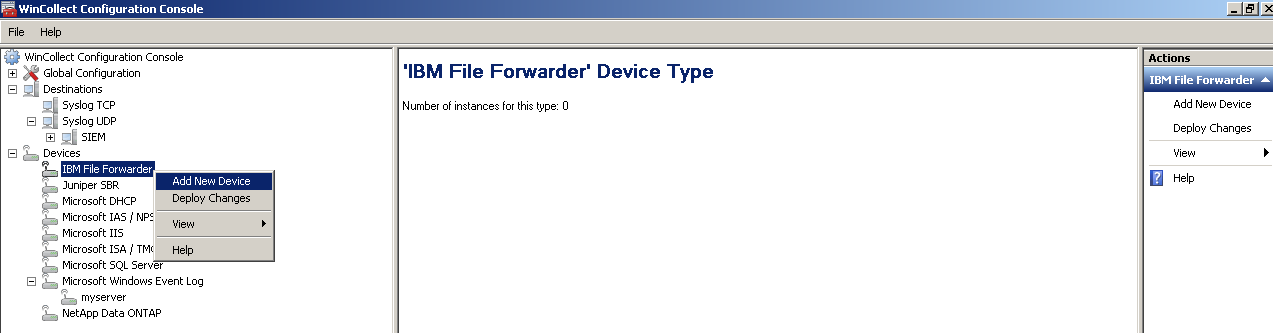
1. In Devices section right click "IBM File Forwarder" and "Add New Device"


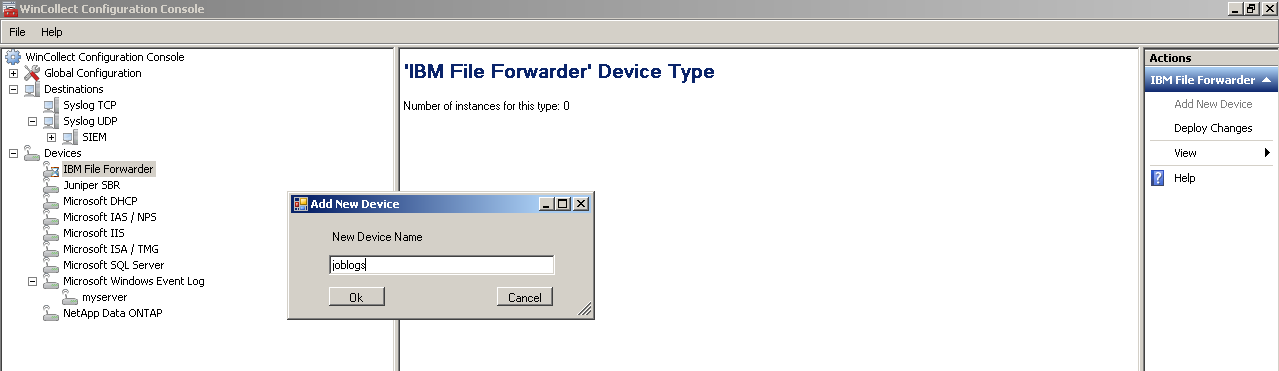
2. Put name of device and press OK


3. Put "Device Address" then "Root Directory"-(path of log files to collect)
Add "Destination Required" which we have added previously by the name of SIEM and "Deploy Changes"


Its complete at client end, now you have to check it in SIEM server and add it in "Log Source" option of Admin tab if not added by itself.

Ports Required to start communication between SIEM Server and Wincollect agent.

TCP: 8413, 443 (Bi-Directional - SIEM Server end, Wincollect end)

UDP: 514 (SIEM Server end)

IBM WINCOLLECT INSTALLATION AND CONFIGURATION
IBM QRADAR WINCOLLECT INSTALLATION AND CONFIGURATION
STEP BY STEP WINCOLLECT INSTALLATION AND CONFIGURATION
WINCOLLECT INSTALLATION AND CONFIGURATION GUIDE

Wednesday, 29 April 2015

NETWORK SCANNING TOOLS

NETWORK SCANNING/TROUBLESHOOTING TOOLS

Advanced IP Scanner: Scanning System and Network Resources

ID Serve: Banner Grabbing to Determine a Remote Target System

Amap: Fingerprint Open Ports for Running Applications

CurrPorts: Monitor TCP/IP Connections

GFI LanGuard: Scan a Network for Vulnerabilities

Nmap: Explore and Audit a Network

NetScan Tools Pro: Scanning a Network

LANSurveyor: Drawing Network Diagrams

Friendly Pinger: Mapping a Network

Nessus: Scanning a Network

Global Network Inventory: Auditing Scanning

Proxy Switcher: Anonymous Browsing

Proxy Workbench: Daisy Chaining

HTTPort: HTTP Tunneling

MegaPing: Basic Network Troubleshooting

G-Zapper: Detect, Delete and Block Google Cookies

Colasoft Packet Builder: Scanning the Network

Dude: Scanning Devices in a Network

NMAP PORT SCANNING COMMANDS

NMAP PORT SCANNING COMMANDS

1. To scan a udp port of a host
nmap -v -sU -Pn 10.10.x.xx

2. To scan TCP ports ranging from 1 to 65535 of a host
nmap -v -Pn -p1-65535 10.10.x.xx

Tuesday, 28 April 2015

UNHIDE THE HIDDEN FILES AND FOLDERS IN WINDOWS

How to un-hide all the files and folders in windows?
How to un-hide all the files and folders in windows with hide option locked?
How to un-hide all the files and folders in windows hidden and locked by virus?

1. Open a command prompt from start menu and run following command to un-hide the files in f: drive.
attrib -r -s -h f:\*

2. Open a command prompt from start menu and run following command to un-hide the files and folders in f: drive.
attrib -r -s -h f:\* /s /d

Friday, 24 April 2015

IBM QRADAR WINCOLLECT AGENT INSTALLATION AND CONFIGURATION

WinCollect Agent Installation, Configuration and Troubleshooting

NOTE: Always install wincollect agent with Admin privileges
Always stop service then start
Always stop service before uninstalling wincollect agent
Always delete previous wincollect agent folder in hard drive in case of re-installation

WinCollect Installation Steps:
1. Always install wincollect agent with Admin privileges

2. Click Next

3. Accept the agreement and Click Next

4. Let the user name and organization as it is and Click Next

5. Select the Installation path if you have space in C: drive then leave it as  it is other wise change it
Note: Wincollect can cache 600MB (as per setting) logs in default path

6. Put Host Identifier as IP or Hostname then Authentication token then SIEM Server or log collector ip in "Configuration Console (host and port):" and leave the "Syslog Status Server ..." section blank and click Next.
Note:Authentication Token can be taken from SIEM server Web Console "Admin" tab then "User Management" Section and "Authorized services"

7. Click "Enable Automatic Log Source Creation" and put log source name which will appear in SIEM and log source identifier as IP or Hostname which was selected in previous section Host Identifier.

8. Click Next without any changes

9. Click Install

10. Click Finish

WinCollect DSM Configuration Steps

To collect Multiple logs from one server like OS logs and any .txt or .log file of any application on that server. Follow below steps for DSM Configuration
1. Add a DSM to Collect OS Logs and select "security", "system", and "application" or as per requirement.
2. Add a DSM to Collect .txt or .log file logs from same server